How to Choose a Security Camera Installer: What to Look For
You have decided you need security cameras. Maybe you have been researching cameras, watching YouTube reviews, and reading comparison articles. Now comes the part most people get wrong: choosing who installs the system.
The installer matters as much as the equipment — sometimes more. A great camera installed poorly gives you blind spots, exposed wiring, unreliable connections, and a system you stop trusting after the first missed event. A good installer with decent equipment outperforms a bad installer with premium hardware every time.
This guide covers what to look for, what to avoid, and what to expect from a professional security camera installation in the GTA.
Questions You Should Ask Every Installer
Before you hire anyone, ask these questions. How they answer — and whether they answer at all — tells you everything you need to know.
Are You Licensed and Insured?
In Ontario, security system installers should carry commercial general liability insurance at minimum. This protects you if the installer damages your property during installation — drills through a water pipe, drops a tool on your car, or causes an electrical issue. Ask for proof of insurance, not just a “yes.”
Licensing requirements vary by municipality in the GTA. Some areas require a business license for trades work. A legitimate installer will be able to show you their business registration, insurance certificate, and any applicable trade credentials without hesitation.
Do You Do Your Own Work or Subcontract?
Some companies take your order and send a subcontractor you have never spoken to. That subcontractor may be excellent or may be the cheapest available crew. Ask whether the people who show up at your home are employees of the company or third-party subcontractors. Direct employees typically have more accountability, consistent training, and vested interest in quality because they represent the brand on every job.
What Does a Site Assessment Include?
A professional installer should visit your property before quoting. During the site assessment, they should walk the entire property, identify vulnerable areas, discuss your specific concerns, evaluate WiFi coverage (if wireless is being considered), plan camera positions, assess cabling routes, and note any installation challenges (brick walls, long distances, heritage home restrictions).
If someone quotes you over the phone or by email based solely on the number of cameras you want — without seeing your property — that is a red flag. A 4-camera install at a bungalow in Aurora is a completely different job than a 4-camera install at a three-storey home in North York. The quote should reflect your property, not a generic price list.
Can You Show Me Examples of Past Work?
A good installer has photos or videos of completed installations. Look for clean cable management (cables hidden inside walls or in painted conduit — not draped across siding), properly aligned cameras, tidy NVR setups, and finished work that looks intentional, not improvised. If they cannot show you past work, ask why.
What Warranty Do You Offer?
Understand what is covered and for how long. There are typically two warranties in play:
Equipment warranty: Covered by the camera manufacturer (typically 1-3 years). If a camera fails due to a manufacturing defect, it gets replaced.
Installation warranty: Covered by the installer. This covers workmanship — if a cable connection fails, a mount comes loose, or the system stops functioning due to an installation error. A reputable installer offers at least 1 year on workmanship. Some offer 2-3 years.
Get the warranty terms in writing before installation begins. Verbal promises disappear when something goes wrong six months later.
What Happens After Installation?
The job is not done when the last camera is mounted. Ask about post-installation support:
Will you walk me through the system? You should receive a thorough walkthrough covering live viewing, playback, motion alerts, app setup on your phone, and basic troubleshooting.
Can I call you if something stops working? Things go wrong — firmware updates cause glitches, hard drives fail, cameras need repositioning. A good installer provides ongoing support, not a “call the manufacturer” brush-off.
Do you offer maintenance or check-ups? Annual system health checks — cleaning camera lenses, checking connections, updating firmware, verifying recording — extend the life of your system and catch problems before they become failures.
Red Flags: When to Walk Away
Not every installer deserves your business. These warning signs should make you look elsewhere:
No Site Visit Before Quoting
If an installer is willing to quote your job without seeing your property, they are guessing. That guess will be wrong — either too low (and they will cut corners or add charges later) or too high (and you are overpaying). A site visit takes 30-60 minutes and is standard practice for any legitimate installer.
The Lowest Bid by a Wide Margin
If you get three quotes and one is dramatically lower than the other two, something is missing from that quote. Cheap hardware, no warranty, exposed cabling, no NVR included, no app setup — the discount has to come from somewhere. In security, the cheapest option is often the most expensive after you pay to fix or redo the work.
No References or Reviews
An installer who cannot provide references from past customers or has no online reviews (Google, HomeStars, Yelp) is either new and unproven or has a history they do not want you to see. Established GTA installers should have a track record you can verify.
Pressure to Sign Immediately
“This price is only good today” or “We have a crew available tomorrow but we need a deposit now” — these are sales pressure tactics, not professional behaviour. A legitimate quote should be valid for at least 2-4 weeks. Take your time, compare options, and make an informed decision.
No Written Quote or Contract
Everything should be in writing: equipment list (with specific models), installation scope, timeline, total cost, payment terms, warranty details, and what is included in the price. A handshake deal for a $3,000+ installation is a recipe for disputes.
Refuses to Discuss Camera Brands or Models
If an installer is vague about what hardware they use or says “we use our own system” without specifying brands and models, be cautious. You deserve to know exactly what is being installed in your home. Reputable installers are transparent about their preferred brands and can explain why they chose them.
What a Good Installation Includes
When you hire a professional, here is what the process should look like from start to finish:
Step 1: Site Assessment
The installer visits your property. They walk the perimeter, discuss your priorities (what areas concern you most?), evaluate the structure (brick, stucco, siding), identify cable routing options, and check power availability. For wireless considerations, they test WiFi signal strength at each potential camera location. This visit is typically free.
Step 2: Detailed Quote and Camera Placement Plan
You receive a written quote itemizing every component — cameras (with model numbers), NVR, hard drives, PoE switch, cables, connectors, mounts, and any additional materials. The quote includes a simple camera placement map showing where each camera will go and what area it covers. Labour, timeline, and warranty terms are clearly stated.
Step 3: Installation Day
The installation crew arrives at the scheduled time. For a typical 4-camera residential system, expect the work to take 4-6 hours. Here is what happens:
Cable routing: Ethernet cables are run from each camera location back to the NVR location. In most GTA homes, cables run through the attic, basement, or along exterior walls inside conduit. Holes are drilled with care, sealed with silicone to prevent water entry, and cables are secured with clips or run inside protective conduit.
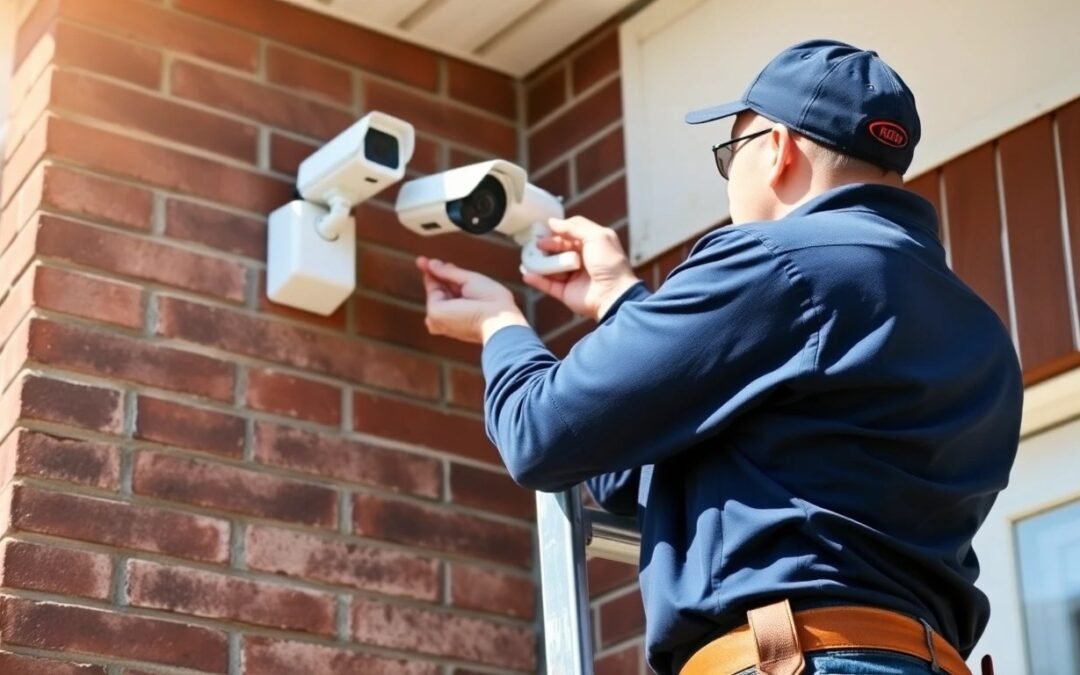
Camera mounting: Each camera is mounted securely using appropriate anchors for the surface (brick anchors for brick, lag bolts for wood, toggle bolts for vinyl). The camera angle is adjusted to cover the intended area with the right field of view — no dead zones, no excessive sky or ground in the frame.
NVR and network setup: The NVR is placed in a secure, ventilated location (closet, basement, utility room). Hard drives are installed, PoE switch is connected, and all cameras are verified online and recording. The NVR should be positioned where it is not easily accessible to intruders — if a burglar can grab the NVR, they take your evidence with them.
App and remote access configuration: The installer sets up remote viewing on your phone, creates your account, configures motion detection zones, sets recording schedules, and ensures alerts are working. You should be able to view your cameras from your phone before the installer leaves.
Step 4: Walkthrough and Training
Before the installer leaves, they walk you through everything: how to view live feeds, how to play back recorded footage, how to adjust motion sensitivity, how to download clips, and how to contact support. They should answer every question you have and not rush out the door. A good installer wants you to feel confident using the system — not confused and Googling tutorials that night.
Step 5: Clean-Up
All installation debris — cable scraps, packaging, drill dust, anchor casings — is cleaned up. The work area should look better than (or at least as good as) it did before installation. Exposed cables should be inside conduit, painted to match the wall, or hidden entirely. If you can see a mess of cables hanging from your eaves, the job is not done.
Why Local Matters
When choosing between a national chain, an online-only company, and a local GTA installer, local almost always wins for security camera installation. Here is why:
Site assessment: A local installer can visit your property, assess it in person, and provide an accurate quote. An online-only company bases their quote on your description and photos — they cannot feel the brick, test the WiFi, or notice the tree that will block camera view in summer when the leaves return.
Response time: When your system goes offline at 11 PM on a Friday, a local company can troubleshoot by phone and, if needed, be at your property the next day. A national chain routes your call to a call centre. An online company sends you a troubleshooting email.
GTA-specific knowledge: A local installer knows that brick homes in Toronto and North York need masonry drill bits and concrete anchors. They know that GTA winters require cameras rated for -30°C. They know that Rogers and Bell internet packages affect NVR remote access configuration. They know the permitting and condo board requirements in GTA municipalities. National companies apply generic solutions that may not account for these local realities.
Accountability: A local business depends on its reputation in the community. A bad review on Google from a Vaughan homeowner is visible to every other potential customer in Vaughan. Local installers have a direct incentive to do excellent work and provide excellent service because their neighbours are their customers.
Pricing Transparency: What to Expect
Security camera installation costs in the GTA vary based on the number of cameras, property type, cable run complexity, and equipment quality. Here are general ranges so you know what is reasonable:
2-4 cameras (basic residential): $1,500 – $4,000 installed. Covers front door, backyard, and 1-2 additional areas. Includes NVR, cables, and basic setup.
4-8 cameras (comprehensive residential): $3,500 – $8,000 installed. Full perimeter coverage plus driveway and garage. Higher-resolution cameras, larger NVR storage, clean conduit runs.
8-16 cameras (large residential or small commercial): $8,000 – $20,000 installed. Multiple structures, long cable runs, commercial-grade equipment, managed PoE switches, and extended storage.
Be wary of quotes significantly below these ranges. Also be wary of quotes significantly above — some companies inflate prices with unnecessary equipment or premium branding surcharges. Get at least 2-3 quotes, compare the scope of work (not just the total price), and ask questions about anything you do not understand.
What to Expect on Installation Day
Knowing what to expect reduces stress and helps you prepare:
Before the crew arrives: Clear the areas where cameras and the NVR will be installed. Move furniture away from walls if cables need to run behind them. Make sure the installer has access to the attic, basement, or crawl space if cables are being routed through these areas. Have your WiFi password ready if remote access setup requires it.
During installation: The crew will drill holes, run cables, and use power tools. Expect some noise and minor dust, especially if drilling through brick or concrete. Good installers lay drop cloths and clean as they go. You do not need to supervise every step, but being available for questions is helpful — “Do you want this camera angled more toward the driveway or the sidewalk?”
Timeline: A 4-camera residential install typically takes 4-6 hours. An 8-camera system is usually a full day. Commercial installations (16+ cameras) may span 2-3 days. Weather can affect exterior work — heavy rain or extreme cold may require rescheduling outdoor portions.
After the crew leaves: Test every camera from your phone. Walk around the property and verify each camera’s view covers what you expect. Check night vision after dark. Make sure motion alerts are triggering correctly. If anything is off, call the installer while the work is fresh — adjustments are normal and should be included.
Frequently Asked Questions
Should I buy my own cameras or let the installer supply them?
Either approach works. If you buy your own, make sure they are compatible with the NVR and that the installer is willing to warranty their workmanship on equipment they did not supply. Most professional installers prefer to supply the equipment because they can ensure compatibility, warranty coverage, and optimal performance. The markup on equipment is how installers make part of their profit — this is normal and expected.
How do I know if an installer is overcharging me?
Get 2-3 quotes with detailed scope of work. Compare equipment models, camera count, cable types, NVR specs, and included services (app setup, motion zone configuration, walkthrough). The cheapest quote is not always the best value, and the most expensive is not always the best quality. Look for the quote that offers the best combination of equipment, workmanship warranty, and post-install support at a fair price.
Can I add more cameras later?
Yes, if the system is designed for expansion. A good installer plans for growth — using an NVR with extra channels and a PoE switch with spare ports. Adding 2 cameras to an existing 4-camera system is straightforward if the infrastructure supports it. Discuss future expansion during the initial site assessment so the installer can plan accordingly.
Do I need to be home during installation?
For residential installations, yes — at least for the walkthrough and app setup at the end. Some homeowners prefer to be present throughout, and that is perfectly fine. For commercial installations, a designated point of contact should be available on-site or by phone to answer questions and make decisions about camera positioning.
What if I am not happy with the camera angles after installation?
Reputable installers include camera angle adjustments within a reasonable period after installation — typically 1-2 weeks. Live with the system for a few days, review the footage, and note any areas that need adjustment. A legitimate installer will come back and fine-tune camera positions at no extra charge. This should be part of the installation warranty.
How long does a professional camera system last?
Quality cameras and NVRs typically last 5-10 years with proper installation. Hard drives may need replacement every 3-5 years (they are mechanical components with a finite lifespan). The cables and infrastructure last much longer — 15-20+ years for properly installed Cat6 ethernet. When it is time to upgrade cameras, the existing cabling and infrastructure usually remain usable.
Looking for a security camera installer in the GTA you can trust? We offer free on-site assessments, transparent pricing, written warranties, and post-installation support. Get your free quote or call (416) 890-3639 — we will walk your property, answer every question, and give you a detailed proposal with no pressure.